

How to access your hosted emails from a free Gmail account.
Step 1: Log in to Your Gmail Account
Go to https://mail.google.com/ and log in to your Gmail account using your credentials.
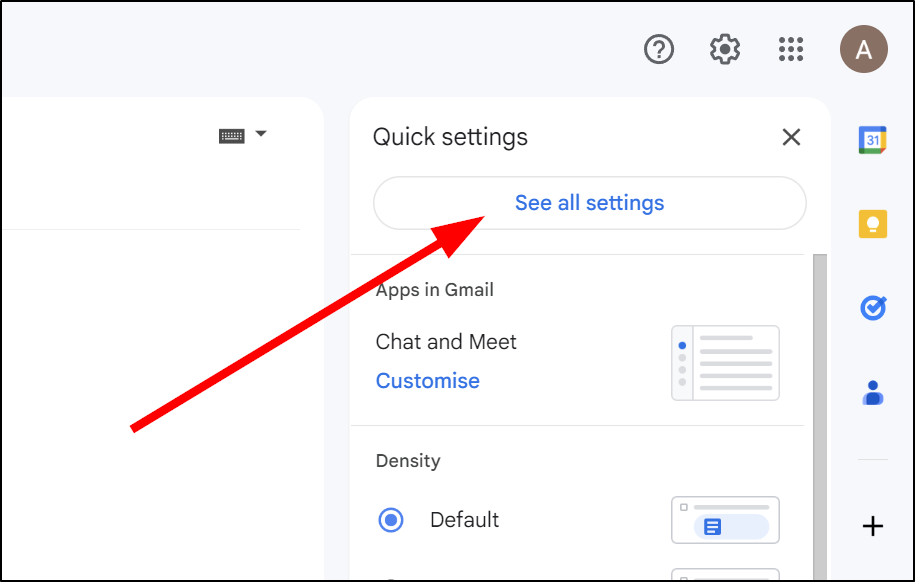
Step 2: Access Gmail Settings
- Click on the gear icon in the top right corner of your Gmail account.
- Click on "See all settings".
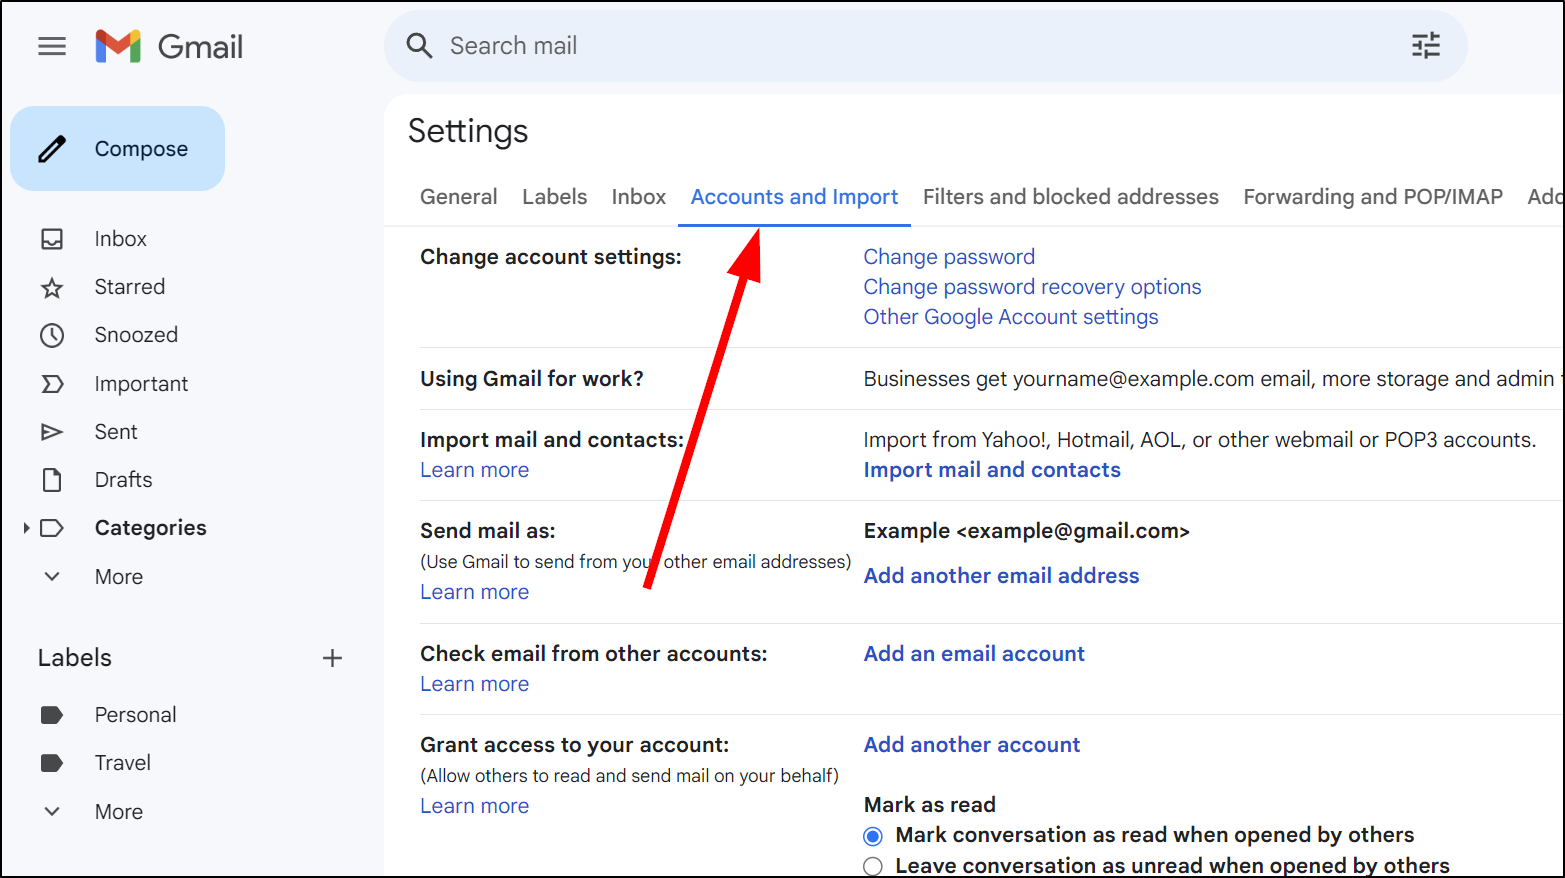
Step 3: Go to the "Accounts and Import" Tab
- Click on the "Accounts and Import" tab.
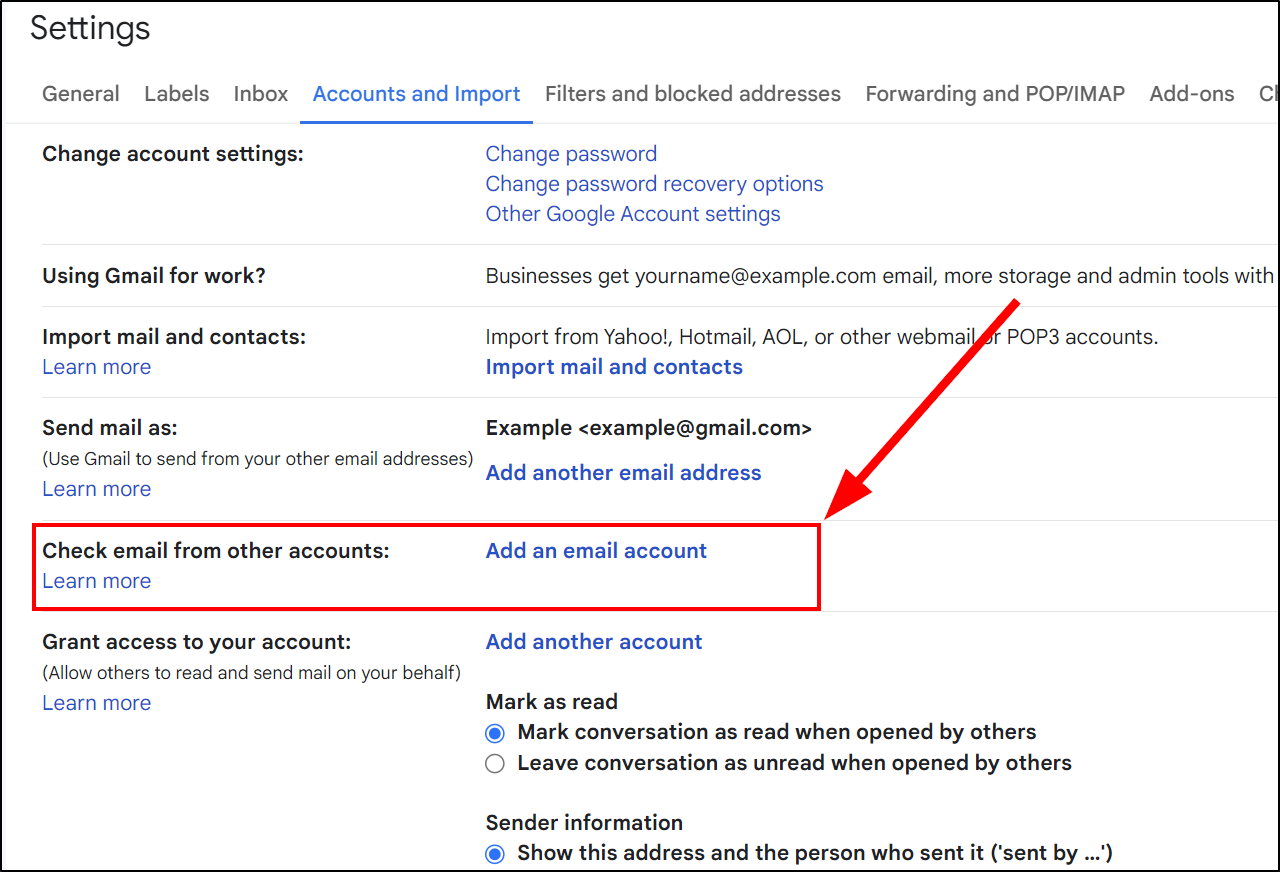
Step 4: Add Another Email Address
- Under the "Check mail from other accounts" section, click on "Add an email address".
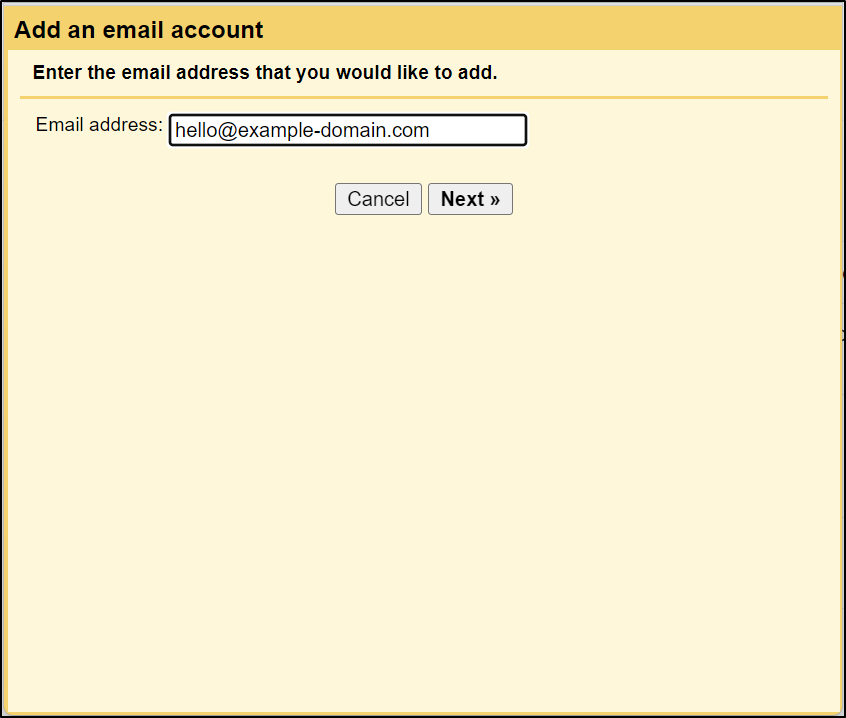
Step 5: Enter Your Email Address
- Enter the email address you want to add to your Gmail account and click on "Next Step".
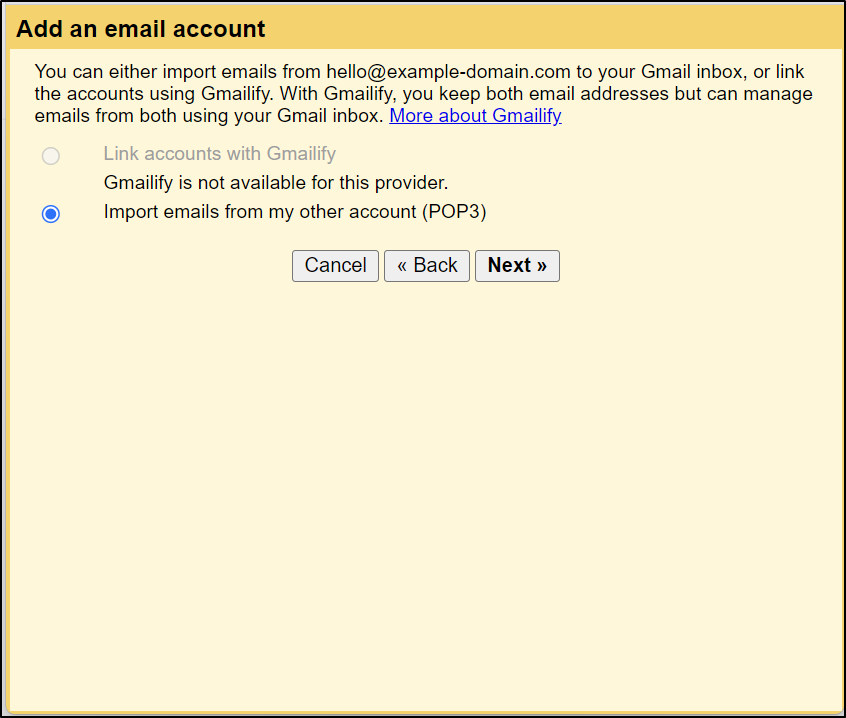
Step 6: Select Email Import Option
- Select (Import emails from my other account (POP3) and then click Next
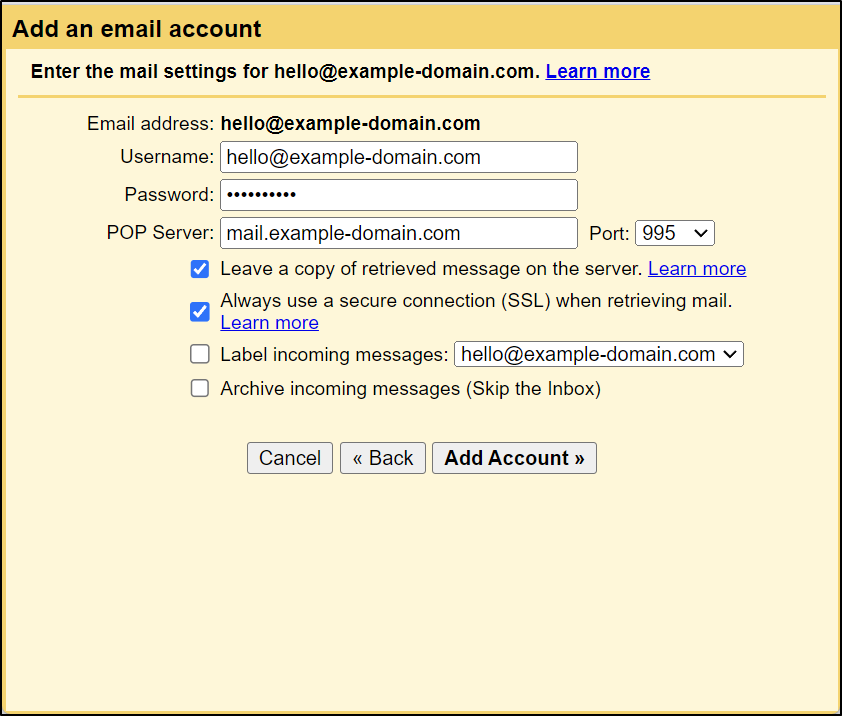
Step 7: Configure POP Server Settings
- Enter the username, password and POP server address for your email hosting service.
- Set the port to 995 (SSL Encryption)
- Toggle on Always use a secure connection (SSL) when retrieving mail.
- You may choose if you want to leave emails on the server or remove them from the server when they are downloaded to Gmail
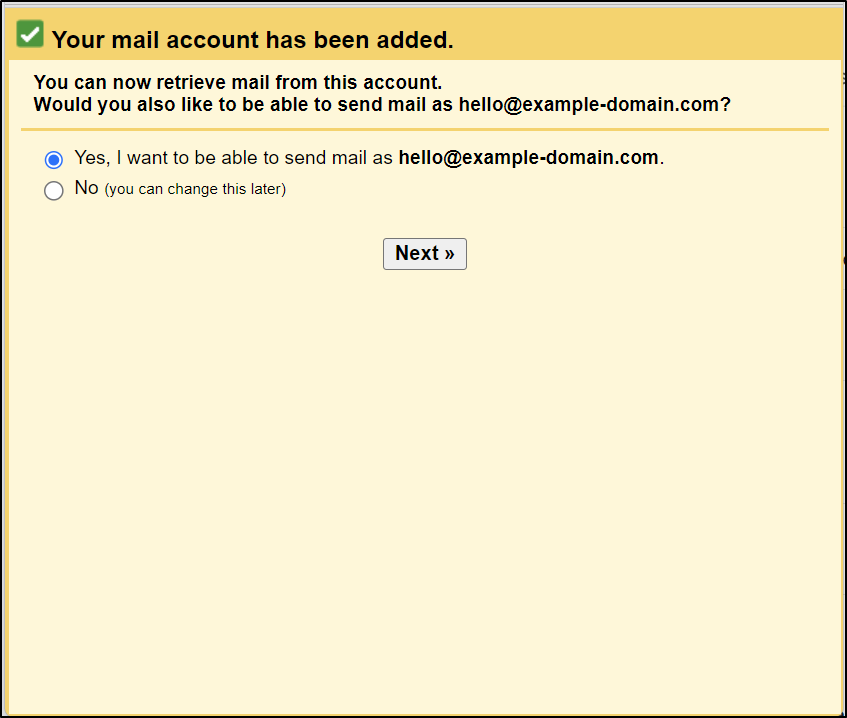
Step 8: Enable Sending Mail from Gmail
- The setup will ask you if you want to be able to send mail as your email address from Gmail, select Yes and then click Next.
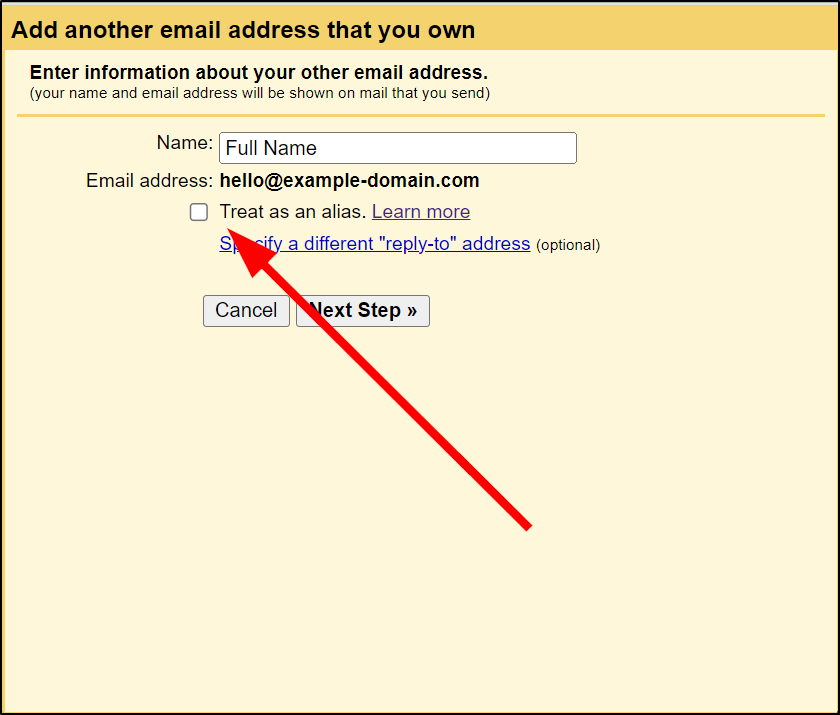
Step 9: Enter Sender Information
- Enter your full name to appear on the envelope of your emails, and then toggle off "Treat as an alias".
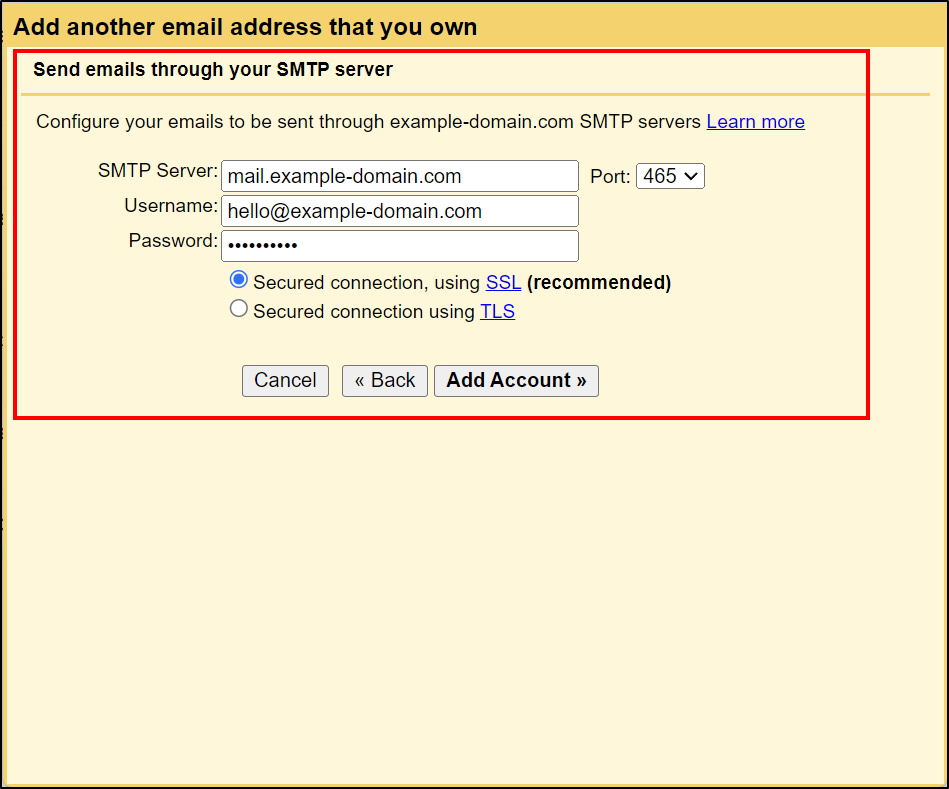
Step 10: Configure SMTP Settings
- Enter the login details for your SMTP email account (outgoing mail server, username, password) and click on "Add Account".
Step 11: Verify Your Email Address
- Check your email for a verification email from Gmail.
That's it! You have successfully added an email address to your Gmail account. You can now send and receive emails from your business email address directly from your free Gmail account.
